Home Page Project Solar  

Back to main section


Intro


Plan A


Plan B


Plan C


AC200P


Solar Panels


Appliances


Bonus


With increasing electricity prices in 2021/2 and prices of solar panels, and related equipment being more affordable, I decided I wanted to take matters into my own hands.

The Ultimate Plan:

Attach solar panels to the roof of my house, connect them and the wiring in my house to a battery storage system, and go "off grid".


An early proposal with over 16 x 200W solar panels.

Initially I couldn't justify doing this by half-measures, such as getting only a few solar panels, and simply supplementing the energy provided by the Grid, since being connected to the grid incurs a daily fee. Although I wanted to do things as cheaply as I could justify. But plans change...

Plan A, Plan B, and the latest and current Plan C follow below.

Back to Top


Plan A:
I came up with a plan to attach solar panels to the roof of my house without removing the slate (or paying someone to do that). I would also save money in other ways...

Typically solar panels are attached to rails which are in turn connected to bracket which are attached to the roof:


This is how the brackets should be attached.

I decided I would avoid the cost of the roof rails and 'simply' attach the panels directly to the brackets.

I determined that I could use a "stud finding" tool (right) to locate rafters, and then I would drill through the slates there and attach brackets to the outer surface of the roof, sealing the holes with suitable sealant (similar to how solar panels are attached to RVs/camper vans).

Initially the stud finding tool seemed to work better than anticipated and after ascending the roof on a make-shift cat latter (don't worry, there was a flat roof for me to land on if something went wrong!) I tentatively drilled my first holes...

Sadly the drill went through to nothing, rather than a solid rafter.

Being thwarted at this initial stage I filled the hole with sealant and gave up on this plan.

Back to Top


Plan B:
Up until this point my four preliminary solar panels were set up my garden, leaning against some garden furniture. I now considered that since the roof was no longer a practical option I would build some sort of frame to more permanently attach the solar panels to along my garden wall/path. I determined I would have space for eight panels in total; only half of my original plan.

This was perhaps not enough to go off-grid. Up until this point the spring weather had been quite sunny and had been providing enough solar energy for me to run most things in my house (except the cooker and kettle - more on those below). By this point, with the four solar panels, I was already using less than half the "actual" electricity I had been using during the previous couple of summers.

 Back to Top


Plan C:
April 2022: I'd assembled some pieces of wood I already had lying around to act as supports for the solar panels in my garden, but I was less than confident when it came to actually attaching the panels to them. Then I came to another realisation...

...the bottom section of the roof of my house where the flat roof material joins it has flat boards underneath the slates. I determined I could attach a row of metal brackets here, for the lower portion of a row of solar panels, and the top portion could have brackets simply hooking under the row of slates there.

There was enough space to lay up to 12 solar panels vertically. Less than the original proposal of 16, but perhaps enough to be off-grid in the winter.

I have now ordered a set of 'Z brackets' suitable for the implementation of this plan.

 Back to Top


Solar Chargers, Batteries and Inverters:
These are what are required to use the energy from the solar panels, store it, and convert it for use with appliances. An option is to create your own system from these separate components, but my decision was to use an all-in-one system of the portable variety, as these greatly simplify the whole thing, or rather, with my Ultimate Plan, it was to use two or more to not only provide me with more capacity, but also a backup for when I go totally off-grid.

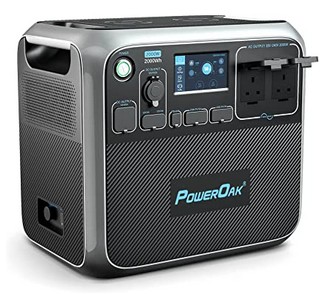
I opted for a PowerOak AC200P.

  • It can provide up to 2000W (3000W peak)

  • It has a 2,000Wh battery that should last 10 years

  • It can accept up to 700W of Solar (more on this below)

Other popular brands include Goal Zero and Jackery.

My findings:

'PowerOak' seems to be synonymous with 'Bluetti'.
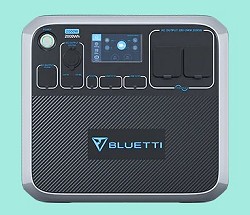
The device was originally the 'AC200' but the battery type was changed and it became the 'AC200P'. However, as others have noted, the system itself not only states 'AC200' but also many of the other details within the menus of the onscreen display reviewers have illustrated are no longer available. "Have we been conned?" Responses on the Bluetti forums basically have the company standing by their product and stating they'll compensate owners 10x over if they can prove the battery isn't of the stated type (although, how would you do this without voiding the warranty?). According to the specs the updated system weighs slightly more than the original so I simply weighed mine for reassurance.

Regarding the touch screen... it stays on all of the time*. This is a concern since, while the battery could last 10 years or more, the system only carries a 2 year warranty, and with a screen that stays on all the time, I fear for the longevity of the screen. Why can't the screen go to sleep and come back on with a simple tap? Also, the screen would be annoying in an RV (as is the bright power LED according to others) while being hard to see outside.

Other failure points are the cooling fans. As far as I can determine there are at least two operating in a push-pull fashion on either side of the system. Every now and then while the system is operating these fans spin up, especially if you use a high-draw appliance. Fans wear out and fail eventually, but the PowerOak had no obvious means of access to replace these, or service/repair anything else. One simple component could fail after the warranty period and this large lump of a system would be rendered useless. Of course there must be a means of gaining access to the innards, but this is yet to be determined; I would consider adding adding a power switch for the screen and maybe disabling the power LED!

*The system powers up as soon as you connect solar panels that are providing sufficient voltage. This is fine for "portable" use as the device is labelled, but for constant use it is problematic/a concern due to that pesky screen staying on. It seems to me that that screen is always consuming power, as are the solar charger and inverter circuits. Therefore at night it makes sense to me to switch everything off (less the battery be somewhat drained by the morning), and unplug the panels* (I intend to add an inline switch to simplify this).

*It appears that if I reconnect the panels too early in the day, before there is a reasonable flow of current, the system will be consuming power before it is generating it. It is technically possible to create an automated switch that triggers a relay once there is sufficient sunlight, but for now I do things manually each day.

700W Solar:

That this system accepts "up to 700W of solar" is a great selling point compared to the competition, but this figure is not as straightforward as it seems as there are others at play.

The solar input functions on an input voltage of 35-150V (according to the included manual; some other published figures vary on this point). This is important to note because a single 200W solar panel will typically be less than 35W and therefore will not be compatible. You will need to connect multiple panels in series to get the voltage up (but not too many that you would be over the upper limit).

The manual also states that the input current will be limited to 12A. This is where the 700W limit is confusing since W = V x A, because if you had multiple panels to provide the upper voltage of 150V, and providing 12A, you would be getting 1,800W. It appears there are two cut-off points: at 12A and at 700W.

Over-panelling:

This is when I learned about 'over-panelling'. The input power will be capped by the system, such as during the height of a sunny day, but will ideally have enough solar during less than optimum conditions. Not all systems support over-panelling but while not specifically stating it in this term, the PowerOak does, and I have read about someone else over-panelling theirs.

Since solar panels are cheaper now than they used to be, over-panelling makes more sense, although it would be pointless to generate vastly more power than I would ever need; I just need to be able to get the PowerOak topped up during the days of the winter months.

Back to Top


Solar Panels:
My initial research was leading me towards the popular Renogy brand of solar panels of the 200W variety. However I discovered an alternative from CraigSolar. These were not only slightly cheaper, but also had a slightly smaller footprint (something that became increasingly important as my plans changed).

To be honest I have been under whelmed by the performance of the solar panels. I was even concerned that the panels I had chosen were falling short of their claimed specs - amps and wattage were low, but it was only Spring and the positioning of my panels was not optimum. I had no prior experience to go on though and bar shelling out on some Renogy ones to compare with I stuck with what I had.

At best I have seen my four 200W panels providing a combined power of little over 400W. This is where over-panelling comes in (see above).

Back to Top


Computers, Cookers and Kettles - Powering My Home:
While I had been deciding which Portable Power Station to get I considered what the power consumption was for each of the appliances in my home. The most power hungry would be the electric oven which could consume 1,500-10,000 watts! The kettle was rated at over 2000W. A microwave that claims to be 800W on the front, according to the label on the back states over 1000W. I had a couple of electric heaters, oil burning central heating that probably required 200W (weird that!), and a coffee machine and numerous computers of unknown wattage.

When I received my PowerOak portable battery system (that I inwardly refer to as my ZPM (more on that below), I gradually began testing various things with it.

The kettle would work, but only for two minutes as it was pulling too much power - if I put just the right amount of water in it, or timed it just right and switched it off and back on, I could make a cup of tea, but it was too close to be practical. Coffee was less problematic because you don't need to boil that.

Since my home still uses an old fuse box I did some medalling here and disconnected everything bar the oven circuit. This also includes a single socket, into which I plugged the kettle. For the rest of the wiring in my home, sockets and lights, I connected everything together and plugged the Power Oak into a single socket - hey presto my house was now powered by the energy of the sun!

Since I could now only use as much energy as my four solar panels could provide, I quickly had to adapt.

I started using a small low-powered laptop (45W) rather than my large power-hungry (200W+) desktop computer for most of my internetting activities. This actually helped me to be more focused in what I was doing.

As noted above, I found myself powering down the PowerOak in the evening. At this time I like to read and I can do this by torch light rather than have the PowerOak on just to power a 1W lamp, it then saves the remaining battery for the morning. Switching my fridge off for the night has been no big deal since my kitchen is one of the coolest rooms in my house. Once I get more solar panels I will likely have enough power to not do this, but as it stands I'm only just getting by with 4 x 200W panels.

Back to Top


Bonus:
I have referred to the PowerOak as my ZPM. A ZPM, or Zero Point Module is a power source, created by the Ancients, from the TV series Stargate Atlantis. Also in Atlantis, before such technology became readily available to the masses, was wireless charging. The PowerOak has these features.

Running with the Stargate Atlantis theme, this page utilises a theme I created for a fan page for the show many moons ago.

Back to Top


../ Go to the
Project section


Home


@ Contact the Webmaster