|
Solar Chargers,
Batteries and Inverters:
These are what are required to use the energy from the solar panels,
store it, and convert it for use with appliances. An option is to create
your own system from these separate components, but my decision was to
use an all-in-one system of the portable variety, as these greatly
simplify the whole thing, or rather, with my Ultimate Plan, it was to
use two or more to not only provide me with
more capacity, but also a backup for when I go totally off-grid.
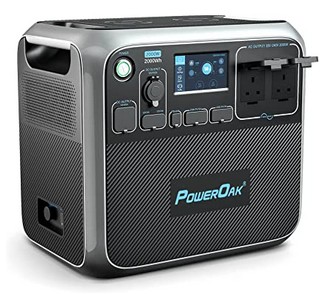
I opted for a PowerOak AC200P.
It can provide up to 2000W (3000W peak)
It has a 2,000Wh battery that should last 10
years It
can accept up to 700W of Solar (more on this below)
Other popular
brands include Goal Zero and Jackery.
My findings:
'PowerOak' seems to be synonymous with 'Bluetti'.
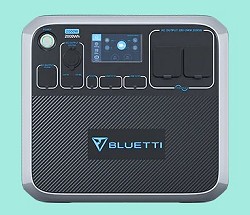
The device was originally the 'AC200' but
the battery type was changed and it became the 'AC200P'. However, as
others have noted, the system itself not only states 'AC200' but also
many of the other details within the menus of the onscreen display
reviewers have illustrated are no longer available. "Have we been
conned?" Responses on the Bluetti forums basically have the company
standing by their product and stating they'll compensate owners 10x over
if they can prove the battery isn't of the stated type (although, how
would you do this without voiding the warranty?). According to the specs
the updated system weighs slightly more than the original so I simply
weighed mine for reassurance.
Regarding the touch screen... it stays on
all of the time*. This is a concern since, while the battery could last
10 years or more, the system only carries a 2 year warranty, and with a
screen that stays on all the time, I fear for the longevity of the
screen. Why can't the screen go to sleep and come back on with a simple
tap? Also, the screen would be annoying in an RV (as is the bright power
LED according to others) while being hard to see outside.
Other failure points are the cooling fans.
As far as I can determine there are at least two operating in a
push-pull fashion on either side of the system. Every now and then while
the system is operating these fans spin up, especially if you use a
high-draw appliance. Fans wear out and fail eventually, but the PowerOak
had no obvious means of access to replace these, or service/repair
anything else. One simple component could fail after the warranty period
and this large lump of a system would be rendered useless. Of course
there must be a means of gaining access to the innards, but this is yet
to be determined; I would consider adding adding a power switch for the
screen and maybe disabling the power LED!
*The system powers up as soon as you connect
solar panels that are providing sufficient voltage. This is fine for
"portable" use as the device is labelled, but for constant use it is
problematic/a concern due to that pesky screen staying on. It seems to
me that that screen is always consuming power, as are the solar charger
and inverter circuits. Therefore at night it makes sense to me to switch
everything off (less the battery be somewhat drained by the morning),
and unplug the panels* (I intend to add an inline switch to simplify
this).
*It appears that if I reconnect the panels
too early in the day, before there is a reasonable flow of current, the
system will be consuming power before it is generating it. It is
technically possible to create an automated switch that triggers a relay
once there is sufficient sunlight, but for now I do things manually each
day.
700W Solar:
That this system accepts "up to 700W of
solar" is a great selling point compared to the competition, but this
figure is not as straightforward as it seems as there are others at
play. The
solar input functions on an input voltage of 35-150V (according to the
included manual; some other published figures vary on this point). This
is important to note because a single 200W solar panel will typically be
less than 35W and therefore will not be compatible. You will need to
connect multiple panels in series to get the voltage up (but not too
many that you would be over the upper limit).
The manual also states that the input
current will be limited to 12A. This is where the 700W limit is
confusing since W = V x A, because if you had multiple panels to provide
the upper voltage of 150V, and providing 12A, you would be getting
1,800W. It appears there are two cut-off points: at 12A and at 700W.
Over-panelling:
This is when I learned about 'over-panelling'. The input power will be
capped by the system, such as during the height of a sunny day, but will
ideally have enough solar during less than optimum conditions.
Not all systems support over-panelling but while not specifically
stating it in this term, the PowerOak does, and I have read about
someone else over-panelling theirs.
Since solar panels are cheaper now than they
used to be, over-panelling makes more sense, although it would be
pointless to generate vastly more power than I would ever need; I just
need to be able to get the PowerOak topped up during the days of the
winter months.
 |

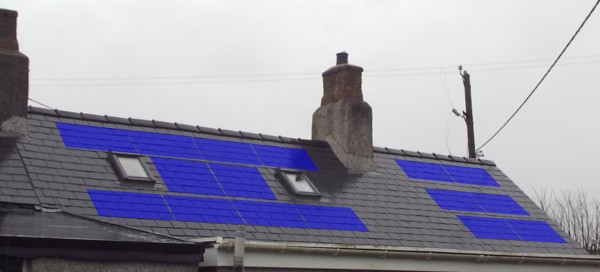
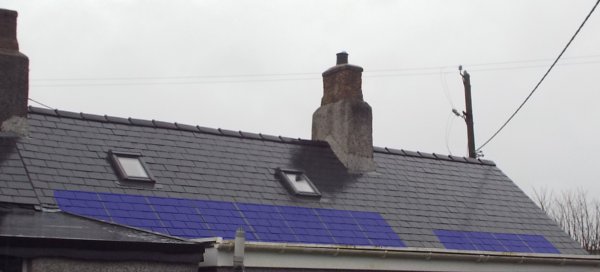
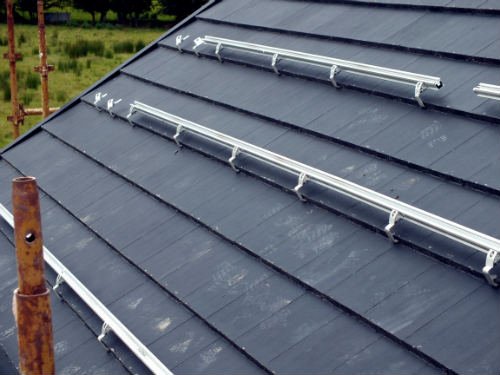
 I
decided I would avoid the cost of the roof rails and 'simply' attach the
panels directly to the brackets.
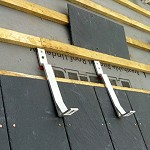
I
decided I would avoid the cost of the roof rails and 'simply' attach the
panels directly to the brackets.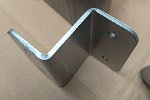 I
have now ordered a set of 'Z brackets' suitable for the implementation
of this plan.
I
have now ordered a set of 'Z brackets' suitable for the implementation
of this plan. I
have referred to the PowerOak as my ZPM. A ZPM, or Zero Point Module is
a power source, created by the Ancients, from the TV series Stargate
Atlantis. Also in Atlantis, before such technology became readily
available to the masses, was wireless charging. The PowerOak has these
features.
I
have referred to the PowerOak as my ZPM. A ZPM, or Zero Point Module is
a power source, created by the Ancients, from the TV series Stargate
Atlantis. Also in Atlantis, before such technology became readily
available to the masses, was wireless charging. The PowerOak has these
features.