|
[29 July 2022] I was handed
one of these to tinker with:
It's
a НПП Б3РП - ПРИЕМНИК
РАДИОВЕЩАТЕЛЬНЫЙ... aka, a
Russian Radio (NPP B3RP-309), it
features USB and SD card input so not
exactly a vintage
collector's item, nor a
particularly "quality" item. It was
intriguing to me how it found
it's way here to the UK; perhaps a
Ukrainian brought it with them
to the UK.
The
radio was not working, or
rather, not directly from the
mains. Helpfully, it accepts
various power inputs; batteries,
and also via 6V adapter.

I
tried it with the latter and it
switched on so I opened it up to
investigate further (four screws
with one hidden in the corner of
the battery compartment) - the
back and front then come away
from the central wooden part.
Prior to opening it I realised
upon a second test with my AC
adapter that the socket had
pushed inside, so I had that to
repair.
An
extra washer was required to
better hold the 6V socket in
place.
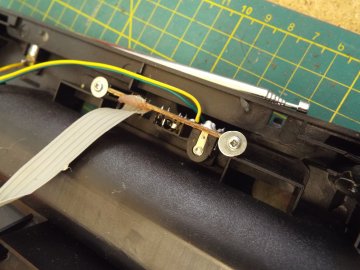
I
first found the wire that goes
to the aerial had come detached,
perhaps it came off when I
opened up the system but it must
have been only just attached if
this was the case - the end at
the PCB was also flimsy. The
wire seemed to be poor as a
whole so I replaced it with a
thicker wire. A simple fix, but
clearly not related to the power
problem.
Everything else checked out,
there simply wasn't 6V coming
from the transformer and I
noticed the wires joining seemed
to have heat damage and were
brittle. It seems the
transformer has burnt out.
|
There were no markings on the
transformer itself so I looked
on ebay for 6V transformers
since that was what the radio
required. I
found these for £7.34.
I
was not convinced this was the
cheapest option and I thought a
dedicated 6V AC adapter would be
more cost effective, and I found
one of these for £4.88.
|
|
Side note:
Power transformers convert the mains AC power (in this
case 230V used in both Russia and the UK) down to a rated
DC voltage (in this case 6V). They also need to be capable
of providing sufficient current for the device (typically
rated in mA, or A - milliamps, or amps respectively -
500mA is half an Amp) - the device, such as your laptop,
or this radio, should state this on a label, sometimes
this is given in Amps or in Wattage, which is V x A.
Therefore, your laptop's charger might state 19V at 2.3A,
which would be around 45W. Some laptops are more power
hungry and require 75W which could mean the wrong charger
would fail, or at least get very hot. |
|
Both
of these options were listed as
1A and therefore better suited
than the 300mA adjustable one
I'd used for testing. There is
no label on the radio stating
the current draw/wattage so I
can only assume that the
original transformer suffered
from the unit being played at
too high a volume that it could
cope with for any length of time. Other than testing
the unit at various volumes with
a test meter I don't know how
else to determine the maximum
current draw from the radio to
ensure the correct transformer
or adapter is used.
Thinking a little more I
realised that the AC adapter
simply contains a transformer
[plus some simple circuitry to
dictate the polarity],
but I would save £2.46 by buying
it encased in plastic instead of
a standalone transformer! I
quite like the idea of repairing
the radio properly and being
able to use a simple power lead,
however I have a cheaper option
still: I will look out for a
second-hand 6V AC adapter at the
thrift store that I can remove
the transformer from.
- -
- - -
[August 2023] This is one of
those projects that simply sits
on my "repair pile" for far too
long, but today I got to it.
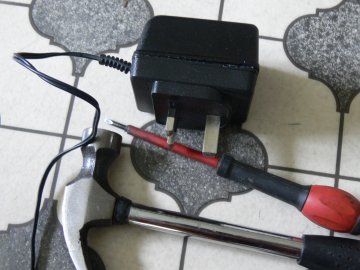
I
had a 6V AC adapter that I
bought from the thrift store for
no more than £1. It was rated at
500mA, so I hoped this would be
sufficient.
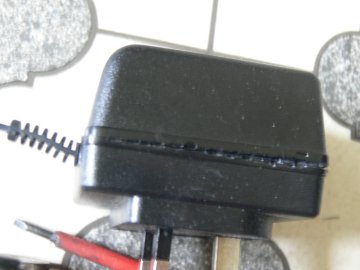
I
set about cracking open the
plastic casing with a
screwdriver and a hammer (yes
this is the way*).
*I
have had to do this to a laptop
charger with a faulty cable, so
it's not ideal when you want to
put it back together in a neat
manner.
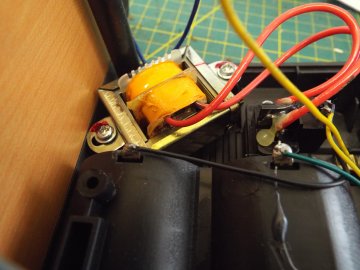
Here
is the transformer inside:
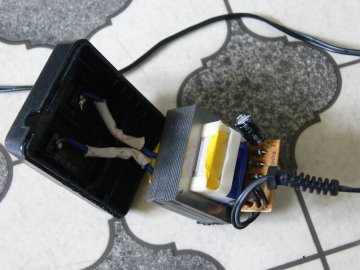
I
actually discovered the wires
connected to the plugs prongs to
allow in the 230V were loose
with dry/broken solder; quite
concerning that this would have
gone unnoticed and would likely
have been causing some arking -
I wonder how common this issue
is in power adapters...
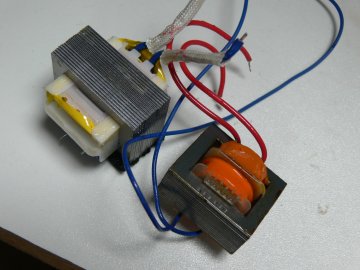
Side-by-side it was clear that
the replacement transformer
(left) was larger than the
original, this was good news in
the sense it surely meant it was
capable of supplying more
current than the original, but
would be bad new if it doesn't
fit the space available in the
radio...
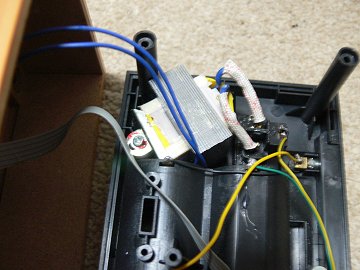
Thankfully it did indeed fit; I
had to use part of the bracket
that encased the original
transformer, and I could only
hold it in place with one of the
original two screws, but this
felt adequate. The soldering of
the wires went well, in fact
further dry joints were found on
the end of the wires where they
join the radio's main circuit
board, so I was able to address
that too. (I think I am correct
in saying it doesn't matter
which way the wires are
connected since the mains power
lead can be inserted either way,
and both wires from the other
side of the transformer are
simply blue with no stated
polarity.)
A
quick test revealed all is
working.
I
found a user manual [here]
Translated, it states: "The
radio receiver... is designed to
receive... broadcasting stations
in the medium wave, short-wave,
and tame(?) in the range of
ultrashort VHF..."
[Back
to Top]
|