|
[10 November 2020] I ordered one
of these for a client, but some
alterations were required:
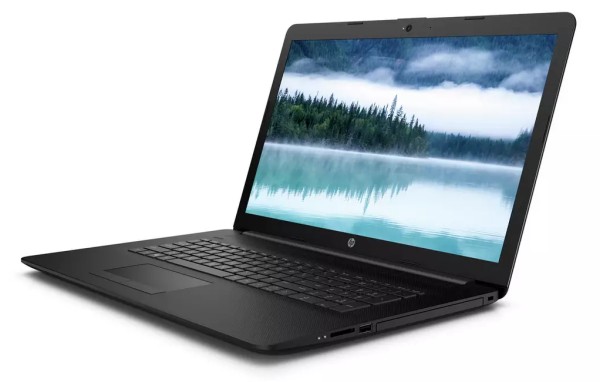
Firstly, I would class this as a
budget 17" laptop with Windows
10. It's nothing special or
flashy, but I typically work
from the bottom of the pile and
work my way up. On this occasion
the HP 17-ca2002na was in stock
and came in at a good price, the
main thing it was lacking was an
SSD. Instead it had a 1TB hard
drive. I really think these are
to be avoided unless you really
need the space over
responsiveness (and aren't
prepared to shell out for a 1TB
SSD). I typically recommend a
240GB as that's generally
adequate for the people I do
work for; if the laptop came
with a 120GB SSD I would have
left it as is.
Another thing, which my client
had sort of stipulated/showed a
preference for was 8GB of RAM
and this one only had 4GB. For
his usage the difference
probably wouldn't have been
noticeable, but since I would be
opening up the laptop to replace
the HDD, and I had 8GB of DDR4
to hand, I went ahead and
replaced both.
Disclaimer: If you don't
know what you're doing, don't go
dismantling things you don't
have a clue about or can't
afford to replace if you bugger
things up. I'm not responsible
if you get yourself in a pickle.
That being said, you might find
this page useful or just
interesting.
The
HP came shipped with 1 x 4GB
DDR4, with one slot free to add
more. I however opted to replace
that single module with a
matched pair. That's what I had
to hand.
Laptops are becoming less
friendly when it comes to
replacing or upgrading such
parts, with no simple-access
covers and batteries being
"built-in". This HP isn't so bad
though; the base is clipped on,
but it also has a handful of
screws (some hidden - which is
the main purpose of this page).
Steps for removing the cover /
base of the laptop:
Ensure the laptop is shutdown
and unplugged (and not just put
to sleep).
I
would recommend wearing cotton
gloves since the plastic of this
laptop is of the annoying (and
all-too-common) kind that
retains fingerprints.
Remove the four visible screws
from the base.
There are two long rubber pads
acting as feet, running the
width of the base of the laptop,
front and back.
The
front pad has a screw hidden
under each end; prise up each
end and undo the screws there.
The
rear pad has four screws hidden
behind it so you will need to
virtually peel off the whole pad
to gain access to them.
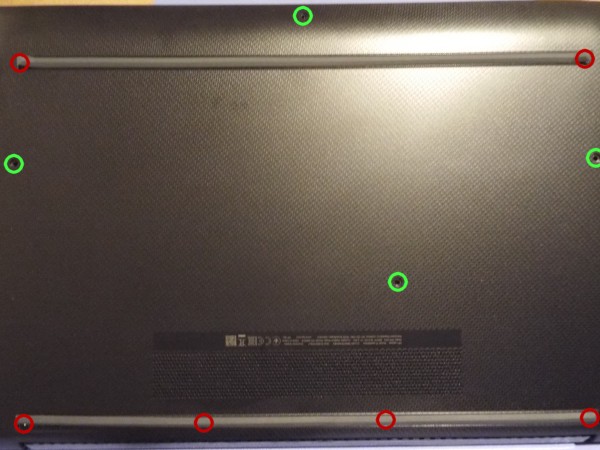
Obvious screws (green) and
hidden screws (red)
 You
will then need to use a plastic
pry too (or thin guitar
pick/plectrum) to unclip the top
panel from the base working your
way around the perimeter (watch
some Youtube videos to see how
this is done) being careful not
to mar the plastic. You
will then need to use a plastic
pry too (or thin guitar
pick/plectrum) to unclip the top
panel from the base working your
way around the perimeter (watch
some Youtube videos to see how
this is done) being careful not
to mar the plastic.
The
base will then pull off (being
careful to ensure you haven't
missed any screws).
Replacing the components:
I
always remove the battery before
touching any components. In this
case it is held in place with
four screws; with these removed
it can be lifted off the board.
I then press the power button on
the laptop to ensure any
remaining power is drained.
I
then removed the RAM and Hard
Drive and replaced them,
installing the replacement SSD
in the Hard Drives 'cage'.
I
then reinstalled the battery and
powered on the laptop to ensure
all was well. It started up only
prompting me regarding the CMOS
data since the battery had been
removed (no separate CMOS
battery in these).
Once
I was satisfied the replacement
components were installed OK I
powered down the laptop and
replaced the cover and screws
(and feet pads) and proceeded to (re)install
Windows from a USB drive.
Final notes:
- As mentioned, this laptop is
fairly accessible; I'd prefer to not have to unclip the whole
base in this way, but laptops these days rarely have separate
access covers for HDD/SSD and RAM. The battery is also housed
within and not easily removable/replaceable.
- The plastic is the annoying kind
that marks easily with fingerprints.
- This laptop thankfully still has
an ethernet socket; I've come across a few now that have done
away with this since most people use WiFi.
- This model lacks a DVD drive (as
many laptops do now), although there is the internal space for
one.
- While this laptop (like many
cheap ones now) lacks a power light on/near the power button to
indicate the system is on (let alone a hard drive light), it
does actually have these lights on the right side; not all that
visible and obvious, but at least it has them.
[Back
to Top]
|