|
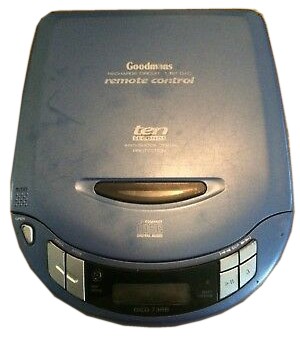 [13 July 2022] Back in
the day when these things were
the music player of choice I had
a portable CD player (Goodmans-branded,
right). It served me well for a
good few years until, if I
remember correctly, it stopped
being able to read discs (I
still have the carry case I used
with it though!). I also had a
Hi-Fi (also Goodmans-branded) at
the time of which the CD player
also stopped reading discs - I
continued using the system by
rerouting the audio from the
player to some make-shift Aux-In
sockets (something the system
lacked), providing further years
of use until the amplifier
seemingly got tired and it grew
quieter and quieter! [13 July 2022] Back in
the day when these things were
the music player of choice I had
a portable CD player (Goodmans-branded,
right). It served me well for a
good few years until, if I
remember correctly, it stopped
being able to read discs (I
still have the carry case I used
with it though!). I also had a
Hi-Fi (also Goodmans-branded) at
the time of which the CD player
also stopped reading discs - I
continued using the system by
rerouting the audio from the
player to some make-shift Aux-In
sockets (something the system
lacked), providing further years
of use until the amplifier
seemingly got tired and it grew
quieter and quieter!
This inability to read discs, I
believe, is a common issue
typically caused by the laser
wearing out (assuming dirt has
been ruled out) - surely this
can come about more swiftly if
using scratched discs as the
laser has to do more work to
track and focus. Whatever the
reason, I no longer have that
player (or Hi-Fi), but I
recently acquired another, in
the form of this cheap find from
a thrift store:
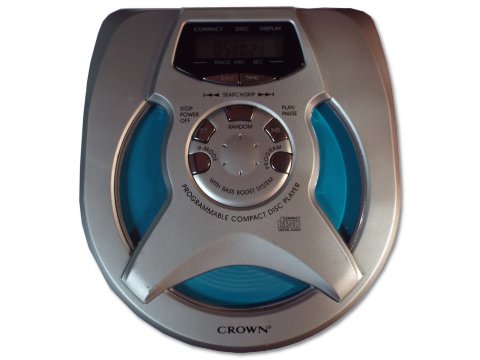
Sadly this turned out to be
faulty too. However, it did
briefly read a disc, in fact I
played a whole album without
fault - the problem was with
getting the player to switch on
at all, indicating to me that it
wasn't a laser issue.
I
have now dismantled the player
and tried various things to test
and get it into working order,
but with little overall success.
Could it be:
-
A
battery leakage? (there were
some signs of a minor leak at
some point)
-
A
faulty ribbon cable that leads
from the main circuit board to
the controls and display module?
-
A
faulty control board?
-
A
lose component or faulty
capacitors?
-
A
combination of the above?
It
seemed to me that it was a
faulty ribbon cable which is
somewhat unique to this player
since it has the controls and
display on the lid, and thus the
ribbon is repeatedly flexed. The
buttons also seemed like they
could be fragile due to this
being a particularly cheap
(later) player (rather than
being an early one of a
reputable brand).
I
managed to dismantle the player,
first by removing the screws
from the base, then prying the
base off, being careful not to
break clips or damage the
sockets and controls that run
down the right side of the
player.
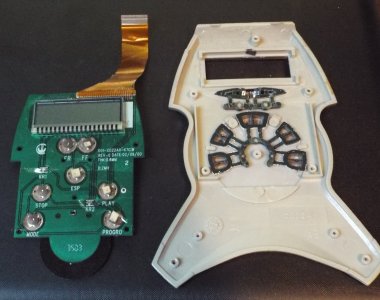
I
first inspected the board and
the possible corrosion issue,
and checking if any components
were lose. I also manipulated
the ribbon cable to see what
effect that would have but the
fault was so persistent and
random that it was hard to tell.
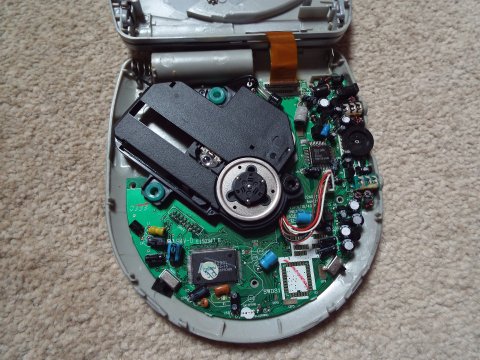
All
pretty "simple" and cheap
inside.
One
odd and concerning thing I did
discover was that I also found
in the thrift store the
Crown-branded AC adapter that
was supposedly donated with this
player; the ratings matched, but
upon testing it with it plugged
in (because the power jack was
too small to do so independently
with my multimeter) that instead
of putting out the rated and
required 4.5V, it was producing
7V. I was concerned that this
over voltage (the player can
also run off 2 x AA batteries
which would be no more than 3V)
would have caused damage.
However, I have also guessed
that this apparent over-voltage
is produced while there is no
load while the player is not
operating - I have not yet been
able to confirm this though.
Moving on and it seemed the
ribbon cable where it slots into
the board could be an/the issue.
I
tried detaching the ribbon cable
and using deoxit there with no
improvement. I also slipped a
slither of thin plastic down
into the slot to ensure better
contact... with the contacts,
with little to no improvement.
At a
loss I proceeded to dismantle
the lid of the player where the
ribbon cable runs to (out of
sight) and controls are housed.
This was more involving.
I
couldn't see how to actually
remove the lid hinges from the
top section of the player (there
are essentially three layers of
plastic: the base, the layer
beneath the CD, and the lid),
and this needed to be done in
order to gain access to one last
remaining screw. However I
devised a plan.
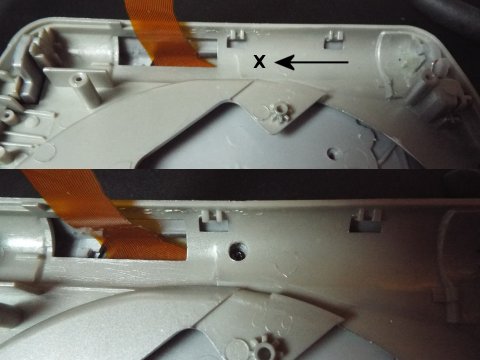
Rather than risk breaking
something or proceeding with the
ordeal of prying the hinges out
of place, I drilled a hole
through the plastic to reveal
that last remaining screw in the
layer beneath; this area being
out of sight at the rear of the
player and beneath the lid when
closed. I removed the screw and
finally I gained full access to
control board so I could inspect
and test the ribbon cable
attachment and buttons.
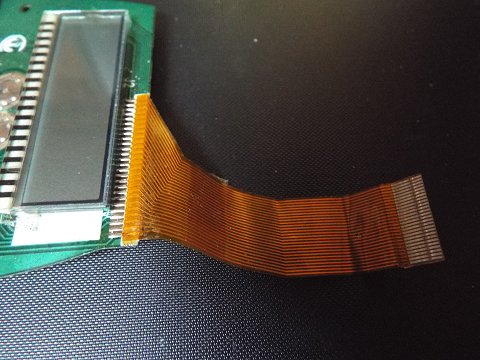
Testing here was sadly still
inconclusive but I elected to
carefully "reflow" the solder
for the ribbon cable. I have
seen someone else fail to do
this (on Youtube) on a device by
using a soldering iron that was
too hot and melted the ribbon
cable, so I used my lowest
wattage iron, a USB powered one
that is pretty useless for most
things, added some liquid flux
and carefully and briefly
touched the iron to each solder
point. It made a reassuring
sizzle and each contact seemed
to sink into place in turn. I
was hopeful and initial results
seemed promising, but as I
proceeded further and further
towards full reassembly, it
became apparent that things
still weren't working right.
I
should add that I can hear (and
see) the laser module move
slightly when the Play/Pause
button is pressed to power on
the player, providing it is
going to switch on. The display
would then always operate. But
sometimes a few presses would be
required and I kind of came to
assume that three presses were
necessary to get this far, but
perhaps this is indicative of
the underlying fault.

The
buttons are actually covered
with a layer of tape,
seemingly to prevent dirt
getting into them and preventing
contact.
The
player is still intermittent in
its ability to switch on, and I
also noticed that not all of the
buttons work anyway; if I can
get it to switch on play and
then I can usually skip tracks
ok, but Stop never works. I was
able to get some of the other
buttons to work, but then they
stopped responding - to me this
seems not to be ribbon-related
since I would be careful not to
move this between tests so that
I wasn't incorporating multiple
variables into my tests. I had
also continuity tested from the
button pads to the far end of
the ribbon cable indicating to
me that the buttons themselves
were operating ok.
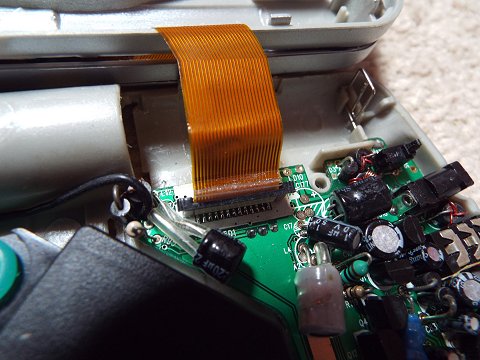
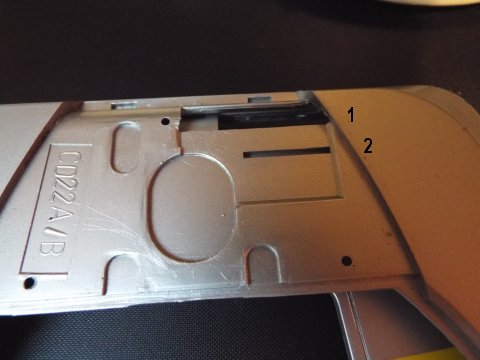
One
other peculiarity was the way
the ribbon cable was routed
through the plastic; there
seemed to be a specific slot for
this (2), but it had been sent
through a wider opening (1) -
was this intentional during
assembly or a mistake? It did
actually seem better through the
larger opening.
My conundrum so far:
I
think I will either reattempt
the solder flow on the ribbon
cable - if brave enough I could
detach it entirely and attempt
to reattach it - and/or failing
that I could replace some
capacitors, beginning with the
one closes to the power source.
If
all else fails I have seen that
similar players are available on
ebay with assumed faulty lasers
and the laser from mine (assumed
good) could be quite easily
swapped to one of those to
produce one good player.
[Back
to Top]
|